Monday, December 28, 2015

TAPESTRY LOVE

LIVING ROOM


I am obsessed with tapestries, if you can't tell by my Instagram posts or my ETSY inventory. I have always been fascinated by the beautiful details that make up a tapestry. What blows my mind even more? The fact that these gorgeous pieces are handmade! Like for real? HANDMADE! Goodness, I get impatient when I am halfway through knitting a scarf, I could not imagine hand making a tapestry.
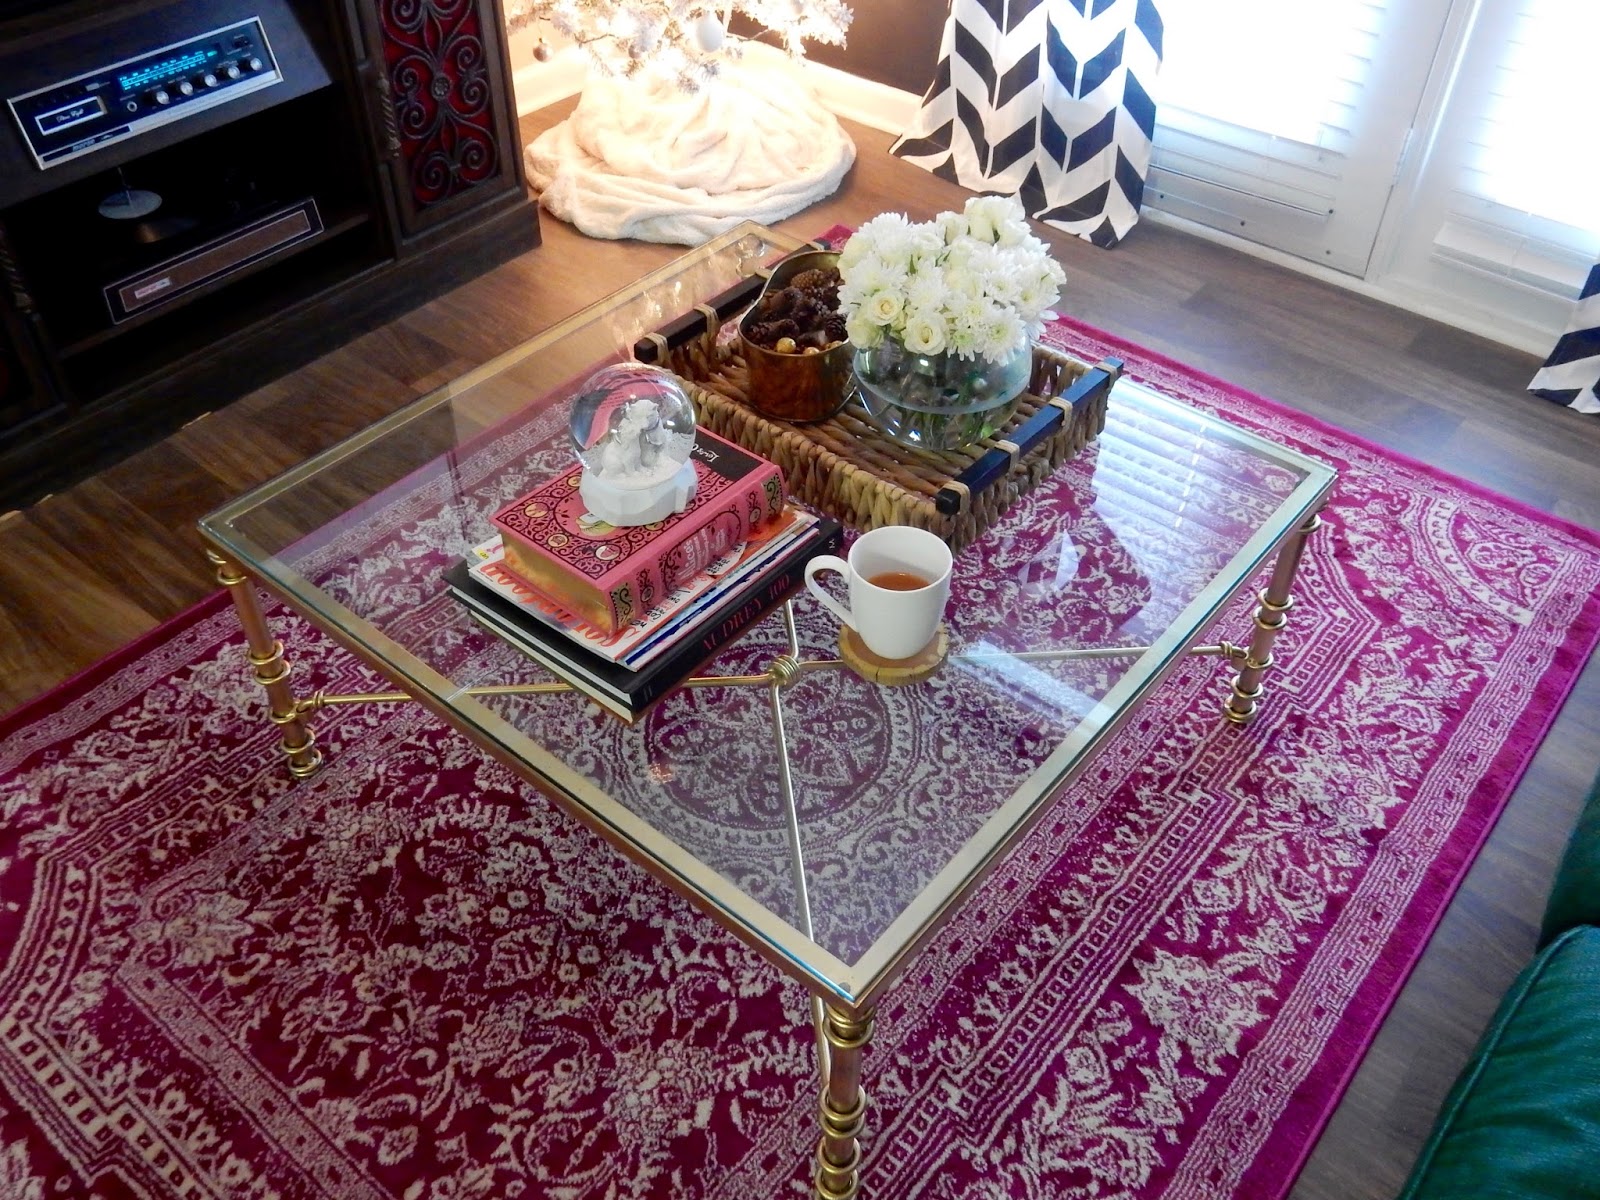
My sweet friend Tori, bought me the one that is hanging in our living room and overtime I walk into our apartment I fall in love with it over and over again. It is neutral enough not to compete with our busy rug and curtains; BUT bold enough to make a statement on its own!


I love that the border of it is black. It helps tie into our black accent wall and black and white curtains. If you haven't caught on, I like to mix prints and colors. A good rule of thumb when working with different prints is, make sure that you have an odd number of prints. And also make sure that they are all different sizes.  I have 5 different prints in our living room right now. Our pillows which are a small scale print. Our rug which is the largest. Our tapestry which is the next biggest. Our curtains that are medium because width wise they are not that large. And you can't really tell from this photo, but our fur throw has a subtle zigzag print sewed in it.
As long as your prints range on the size scale, I think you can get away with anything!

BEDROOM


Long story short, I was not planning on using a tapestry as a headboard. I actually went shopping with my friend and picked up some fabric to make a headboard. That idea was quickly tossed to the side when this black and white tapestry came in the mail! I originally ordered it to add to my shop but  when I hung it up I just HAD to keep it for myself! 


The simple colors are bold yet soft enough to provide that relaxing atmosphere we wanted for our bedroom! I wanted our room to be neutral but not boring! Adding this tapestry certainly helped me achieve that goal!
Rango seems to like it!

The possibilities with tapestries are endless! From wall decor, to yoga mats, to beach blankets, to throws...tapestries are a must!

Here are a few from the Rebely collection! All are handmade in India!

I am obsessed with this one in particular because aside from its gorgeous colors...it's ROUND! And I am just a sucker for a massive circle, I have no idea why! (this one is currently available at my ETSY shop).

I ended up gifting this one to a friend who also used hers in her living room!


I mean come on! How could you not love something so beautiful?
If you are drooling over these tapestries like I do overtime I look at them, head on over to my shop or email me at rebelydecor@gmail.com and I will gladly ship one of these sexy beasts to you!

happy decorating


Friday, December 25, 2015

MERRY CHRISTMAS

MERRY CHRISTMAS, beautiful people!
I have been taking this week off to spend it with my family and friends but I am eager to share fun and exciting news and projects with you all starting this weekend!
It has been nice taking a break from cyber world, but I am excited to get back to doing what I love and share it with all of you.
I pray that your Christmas was filled with joy, peace, and The Lord's blessings; with all your loved ones!
Stay tuned for some new posts this weekend!

happy decorating

Thursday, December 10, 2015

CRAFTS FOR KIDS

It is the winter season. UGH. I am one of those people that live for summer. Then during summer I say I can’t wait for fall. Then in fall I say I can’t wait for winter and snow. I never really liked spring. I feel it is a waste of a season because down here in the Carolinas it gets warm come mid-March and I am out lying by the pool! So to me it is like summer! But right now I am not diggin’ this whole cold thing. I mean today it’s great! It’s 66 and sunny! But the other day, oh my stars is was nippy!
I don’t know about y’all, but when it is cold out, the last thing I want to do is go outside. I have to force myself to get bundled up to go running and I pretty much wrap myself in a blanket to take our dog out to play. I just can’t stand the cold sometimes. People always say, “but you’re from Jersey, you should be used to this cold!” Well no. In Jersey it gets cold and it stays cold. Down here it will be 60 something one day and then 50 the next. That 10-degree change can feel DRASTIC! This weather plays with my emotions and I don’t appreciate it!
I sound like a brat. My friend and I were talking about the weather back in Jersey and how it was so cold and I said, “same here it’s freezing” (mind you it was like 60 that day) and my friend hit me with that straight face emoji like FREEZING? ARE YOU SERIOUS? I guess I have become spoiled by this Carolina weather!
Any way, when it is LEGIT cold outside (and I mean actually cold, not my silly definition of cold) going outside with your kiddies can be brutal. But then you don’t want to just sit inside with them and be bored. I know when I am at work with the little girl I care for, I feel bad if we spend the whole day inside not doing much :/ I feel at a young age children are so moldable and want to learn as much as possible. They have such amazing imaginations and what better way to encourage their beautiful creative minds then doing crafts together?!


Here are a few fun crafts for your kiddies and you to enjoy inside during this cold winter season!

KID FRIENDLY LAVA LAMPS
Growing up I used to love lava lamps!  I was in awe of how the liquid on the inside was separate but worked as a whole to make such an amazing contraption! S.L. Smith photography shows you how you and your little ones can make these easy kid friendly lava lamps with items you probably already have in your house!


UNIVERSE IN A JAR
Ok, now this is a project that I would enjoy! And what a cool way to incorporate how God created the entire world and universe and entrusted us with it (Story of Adam and Eve), because that is how much He loves us! MomDot breaks down how to make these awesome little Nebula Jars.


THUMBPRINT REINDEER
These make my heart melt! LITTLE BIT FUNKY shows you how to make these adorable thumbprint reindeer ornaments! How perfect with Christmas right around the corner! You can add the year or age of your precious little one and make them every year and see how their little print grows!


TUMMY TIME PAINTING
THIS IS AWESOMECanDo Kiddo shows how to put together this painting activity for your little ones who are in the tummy time stage and are exploring things using their hands. But don't stop at tummy time! This is a great project for toddlers and young children who love to paint WITHOUT the messy clean up!


CORK PAINTING
YASSSS a craft that will make me want to finish that bottle of Sweet Red in the fridge ;) This is for you Mama's out there that like your glass of wine... maybe bottle of wine (no judgement here hehe) every now and then. Save those corks and let your babes make pretty trees! The Picky Apple shows you how the cork acts as a "paint brush". You can make these trees for every season, just change the paint color to coordinate for the current season!


LION AND THE LAMB MASKS
Easter is coming up shortly! What a wonderful way to prepare for Resurrection Sunday! You can make these awesome masks and use them to explain what Easter is all about. They can be made anytime of the year because hey, Jesus is both the LION and the LAMB every day of the year! SOURCEPreschool Playbook

How fun do these crafts look! I am running out the door right after I hit the "PUBLISH" button and I am going to get some supplies to make the REINDEER THUMBPRINT ornament for the little girl I watch! Her parents LOVE Christmas and collect ornaments, so this project is absolutely PERFECT for them!

happy CRAFTING


Monday, December 7, 2015

GOODWILL COFFEE TABLE TRANSFORMATION


Hey there beautiful people! It has been such a lovely week! I had off work all week. You know when you just go, go, go and you are so used to going, so much so that you don't realize how badly you need rest? That is where I was at. This past week I did some work around the apartment but for the most part I laid in bed and worked on papers, but mostly laid in bed! It was so GLORIOUS! And now that the my week of rest is over, it is time to get back to work and the real world!
I wanted to share with you all a piece that I am so thrilled with in our living room; our new coffee table! If you look back at my earlier posts you will see how different our apartment looked. Like REALLY different. EMBARRASSINGLY different! My husband and I were actually just talking about that. I have said it over and over again, but I will say it AGAIN for any new readers to my blog....when we first got married 90 maybe even 95% of the stuff in our apartment was given to us by our families. From couches, to tables, to decor, etc there was not much that we picked out for ourselves. We were so grateful that we had people in our lives that wanted to make sure the starting off our lives was comfortable and GAVE us stuff so we didn't need to go out and spend a ton of money. Now that we are more established we are able to afford getting things that are OUR style. I still buy 90% of our stuff at thrift stores or antique malls but to us its "new". It makes me happy to walk into our apartment and see it decorated with things that are OURS.

Ok so now to what this post is actually about. For the longest time we had a farmhouse style coffee table. It was beautiful. I loved it. It served its purpose BUT it was not our style. (It is possible to love things but not want it for yourself). It was something my in-laws gave me when I moved into my first place during college (THANK YOU!!).  I refurbished it and for years it served its purpose and was wonderful. But I ended up selling it. It's actually my first sale listed on the SHOP page of my site! 
So with that table gone, we had no coffee table for about a month. Our style is very eclectic with a bit of boho flare in there so I wanted to get something that was glass. I wanted it to serve the purpose of a coffee table but did not want it to be a big bulky piece that took away from other pieces in our family room. I wanted to show off our rug that I adore and our last coffee table didn't do that. So I saw this Maurice Coffee Table  that was perfect BUT it retailed for $765....$530 on sale. That was no where near what I was willing to pay for a coffee table!


the Maurice Coffee Table I originally saw. Pretty right?!


 So I held off on getting one because I KNEW I would find the perfect one for the perfect price...eventually! There were certainly times where I saw one that I wasn't thrilled about but I knew we needed one and was tempted to get it but I just couldn't be wasteful and buy something unless I KNEW that I KNEW it was something I loved!
So this past week I went to Habitat Restore. Keeping an open mind, knowing that there was a good chance I would not find something I would like. But then I turned the corner and saw coffee table after coffee table fill this row!! I knew there had to be something in there that I would like. BOOM I see this glass coffee table and my eyes lit up! Not to mention it was only $60, um STEAL!


This is what it looked like when I bought it. It was an "interesting" green color with specks of black within it. It almost looked like a faux marble....not the prettiest thing. I thought about painting the base a matte black but my original idea was gold to match our nesting table set and our gold side table by our ghost chair. 
Gold won!
I have a few friends who never used spray paint to paint furniture. And I am hear to tell y'all that it is AMAZING! Seriously I have painted nearly everything with spray paint. It gives an even coat of paint to the object you are painting, it doesn't leave brush marks, and it is quick and easy! I have never been disappointed using spray paint. Especially not GOLD spray paint. I mean come on its gold, how could I ever be unhappy?!

after two coats of Rust'Oleum Gold Metallic spray paint this is what it looked like! Rango is sniffing it to see if he approves! And no, I didn't spray it inside I just wanted to be safe and not take a chance of any paint getting on our rug!

I let it dry for a few hours and then removed the paper towels from the legs and TADA!!

gold was the way to go!!


I am so happy with the glass top because you can still see our beautiful rug.


and just because it is beautiful doesn't mean it isn't everyday functional! We still throw our feet up on it, although that has always annoyed me a little bit with any table for some reason, I think I need a little ottoman

I am SO happy with this coffee table. I wish you could see me through the computer screen right now. God truly knew what I wanted and blessed me with something that is beyond what I imagined and I got to do what I love and paint it to really make it OURS
Don't be afraid to hold off on buying things until you are head of heels in love with it! And don't be above going to thrift stores and Goodwills and Habitat for Humanity and wherever else that isn't a name brand store. You are guaranteed to find a treasure at those fun shops and a treasure with a friendly price tag! It may not be the color you envisioned but thats the beauty of IMAGINATION and PAINT!

*My next post will be on how to properly decorate a coffee table so it not only looks beautiful but it is also functional! STAY TUNED*

happy decorating


Thursday, December 3, 2015

ALTERNATIVE'S FOR STOCKING HANGING

I'm currently sitting on my couch with my blanket catching up on my Keeping Up With The Kardashians (don't judge me) and I am admiring our Christmas decor, specifically our "new" stockings that I just picked up yesterday!Stockings were HUGE in my house growing up. I was just as excited to open my stocking as I was to open my gifts Christmas morning! My parents (well we all know it was my mom who picked the stuff in our stockings out haha) always filled our stockings with the coolest things! Even our family dog will get a stocking filled with doggie goodies! I remember when we were younger we got those zone camera's that would print the picture instantly. DO y'all remember those?! Oh my goodness, those things were AMAZE BALLS. We also got Wonder Balls...."oh I wonder wonder what's in my Wonder Ball?!" hahah I still remember that jingle! We would get gift cards to this local record and CD shop in town and I would always get so excited to go and pick out a new cd (when having actual CD's were popular). The girls would get different makeup items and nail polishes, and the boys would get, well whatever they got haha I never really kept track of the boy stuff cause I loved mine so much. But I think my favorite item that my parents put in our stockings every year even still, is Terry's Orange Chocolate. Oh. My. Gosh. These chocolate balls are SO GOOD! They are obviously orange flavored. But they are also in the shape of an orange and you smash it on the counter to break the ball into "orange slices" and then you ENJOY its chocolatey goodness. That it something I would say became a tradition when it came to stockings, those chocolate balls! YUM YUM.
My husband did not do stockings like we did growing up. So I took this very serious. I wanted him to be able to experience the joy and happiness I did and still do when I open my stocking on Christmas morning. I ended up finding these precious stockings at Goodwill for only $1.99 a stocking! I melted over them the moment I saw them. I have seen plenty at retail stores but I love having something different and these stocking are certainly different, they are not cookie cutter (something I personally like to stay away from). 

yup even Rango gets one 

Now where to hang them? We don't have a fireplace this year in our new apartment so I needed to think of an alternative! I believe that stockings should be in a room that has the most traffic. Because why would you not want everyone to see your beautiful stockings?! We spend A LOT of time in our family room so what better place to hang them then where you can see them from the kitchen, the entry way hallway, the couch, our bedroom doorway.....well our apartment is only 900 sq ft so you could probably see them from anywhere in the apartment haha! But you get my drift.
So here are some inspirational photos of others who chose to hang their stockings from somewhere other than the traditional fireplace mantel!


So cute right? You don't need a fireplace to display your Christmas stockings. I hope my and the other photos inspired you to get creative when it comes to hanging out beautiful stockings! 
Will you hang your stockings somewhere different this year? Tag me in your stocking photo so I can see :) (instagram: @rebelydecor)

happy decorating


Tuesday, December 1, 2015

FUNKY COASTERS


I have a slight, maybe unhealthy obsession with two things. Journals and coasters. Whenever I go to the store I find myself in the office supply/paper section and I am drawn in when I see all the cute gold and teal and pink and polka dots and stripes and arrows and this and that, covered journals. I am still filling up my one journal that my mom got me last year and for some reason I have gotten 5 since then and they are sitting in my workspace just looking all pretty and what not. My husband ended up taking my zebra one to write down his work out plans, #noshame! At least someone is getting use out of it hehe.
And coasters.... DON'T GET ME STARTED! I think that everyone should have MULTIPLE sets of coasters for different occasions. I believe you should have masculine ones for your hubby and his friends when they are watching the game and want to put their beer down. Some everyday ones. And some fun ones to break out for wine night with the girls! And these gold rimmed funky colored coasters are the perfect ones for girls night!


I originally saw coasters like this when I was checking out Pinterest and thought to myself, "I can make these AND add a little glam to them (in comes the gold, my fav)" And can you believe that to make 2 sets of (4) coasters it cost me less than $20?!

What you will need:

LIQUID LEAF
Y'all....I CANNOT say enough good things about this product! For so long I refused to use it because well, for less than an ounce it costs $6. However I got mine from Hobby Lobby and they always have a 40% off coupon on their mobile app so I ended up getting mine for $3.60! And when I say this is AMAZING I mean that this product was sent from heaven above. It is so rich in color and for such a tiny bottle it goes such a long way. I painted a 3.5 ft picture frame, my dresser knobs, a 2.5 ft picture frame and these 2 sets of coasters with one bottle and I still have a little left over! I will certainly be stocking up on more of this stuff!

TILES
This is up to you! I went to Home Depot and got some ceramic tiles for 16 cents a tile. However if you want a different size, texture, shape, etc go for it! Their tiles are all pretty cheap so which ever you pick, you will end up coming out cheap!

ALCOHOL INK
Michaels has these little packs for $9.99 but if you have their mobile app they ALWAYS have a 40% or 50% OFF coupon so I ended up getting mine for $5. They do have different colors, but I really liked the teal in this pack! For 2 sets of coasters I barely used 1/4 of the each bottle. So don't be intimidated by their tiny size. A little truly does go a long way!

RUBBING ALCOHOL
This is what causes the ink to spread out and give that cool and funky pattern. When you are at Michaels you may see an alcohol ink Alcohol BUT it is no different than rubbing alcohol and you probably already have rubbing alcohol in your home, so don't waste the money getting something else!

KRYLON MAKE IT LAST
You can get this at Michaels or Walmart! I would say, if you want to to get it cheaper then go to Walmart. Walmart is always cheaper! But you MUST have this or a sealer similar to this to spray on your coasters once they are all dried to make sure your coasters are protected from water or other liquids!

FELT or CORK
You will need a little bit of either felt or cork to hot glue to the bottom of the tile so that it does not scratch your table top surface. Either work, I personally think that felt is easier to work with!

Now comes the FUN part! This is such an easy project. You will want to knock out a few of these at a time because they are that simple and fun! All you need to do is take a cotton ball generously dipped in rubbing alcohol and rub down the top of the tile. Once you do that, you just do a drop of the alcohol ink right on top of the wet tile. I then used a straw to lightly blow the ink to give it a more or a splattered look. I then did the next ink color and repeated the blowing process with the straw. REPEAT until your tile is covered in colorful goodness!
I loved using a straw to lightly blow on the ink because it gives each coaster a unique pattern!
Once you finish your coasters LET THEM DRY! I know for all you impatient folks this may be tough but trust me you want them to dry completely. If you don't and you put your sealer on wet ink, it will be tacky and not come out right, blehhh.
Once the coasters are dried, it is time for gilding with the liquid leaf! Take a small paint brush and lightly cover the edges of the tile with the liquid leaf. This step gives the coasters the touch of chic that they are craving! I love gold I would add it to everything if I could hehe!

Once you finish all of that it is time to seal your coasters. Take your sealer and lightly spray the top and sides. Allow that first coat to dry. Most sealers say wait 2 minutes between coats. Just feel the top of the coaster and see if it is tacky. Spray the next coat once the first is COMPLETELY dried.

And lastly, it's time to cover the bottom of the coaster with felt or cork. I used felt for mine. All you need to do it trace your tile and cut the square out and hot glue it to the bottom of your coaster.
*when cutting out the lines you traced for the bottom of your coaster, cut along the inside of the line because you do not want any felt hanging over the edges* 
Nice and easy right?! And the results are amazing in my opinion.

I love that each coaster has a different pattern. It is just so funky!


The gilt around the edges is perfection. I love how it makes them look so chic!

Do you love these as much as me? Go ahead and give them a try and tag me in your photos on Instagram @rebelydecor I would love to see your coasters! 

happy decorating 


Friday, November 27, 2015

NESTING TABLE FACELIFT


Hey y'all! So, I have been pretty busy with redecorating our apartment. I am doing it one room at a time and our living room is pretty much done! HALLELUJAH! The last piece I need is a coffee table. I am learning to be picky when it comes to what we get. I mean why wouldn't I be? I don't want to get something just to not like it and then have to get something else. I have a past history of doing that and I am trying to turn over a new leaf because frankly it is a waste of money and time and energy etc.!
Today, for some crazy reason I decided to brave the crowds and go out on Black Friday. WHAT WAS I THINKING?! I ran to the mall to return a sweater I bought the other day and I wanted to cry. Seriously, there were just so many cars, so many people, so much craziness! But I returned my sweater and got a cute hat so whatevs!
Then I went thrifting, and even that was a bit of a circus! I had no idea that Goodwill was having a sale for Black Friday but the whole store was 50% OFF! I scored this 2x3 turkish rug for (DRUM ROLL) $1.61 

It is not perfect. It is missing some of the fringe, but I L-O-V-E it!

So after scoring this awesome rug for our kitchen, I headed next door to one of my favorite thrift stores, in search for some records and a coffee table. I didn't see the coffee table I have had in my mind BUT I did find this nesting table set for $15

Not the prettiest things but they were screaming "BUY ME! MAKE ME PRETTY, PHOEBE!" How could I say no to them?

Because they were missing tops I had to figure out what I wanted to do about that. I could get glass cut, but I did' t want to spend that type of money, and I didn't feel like waiting to get that done. I wanted to tackle this project immediately. So a light bulb went off in my head and I saw the picture frame section and thought, "why don't I just find frames that have glass that is the same shape and size as the table tops and take the glass out and attach it on top?!" I thought that was a pretty genius idea if I say so myself ;)
The woman that was working in the picture section was so helpful. She helped me sort through the whole section to find just the right frames to get the job done. THANK YOU MA'AM!

I got three for $8! Here are two of the frames! I took apart the other one before I could get a photo of it, whoops! But y'all get the idea

NEXT, it was time to spray paint! 

I love Rust-Oleum's Metallic spray paint and always have some on hand! I gave all three tables a light coat of gold spray paint. Once the first coat dried I added a second and let that dry.

you can already see how much of a difference the gold paint makes!

After I let the tables dry it was time to attach the glass to the table tops. I took my trusty hot glue gun and put a little in all four corners of the table tops and quickly placed the glass on top. *MAKE SURE TO MOVE QUICKLY BECAUSE HOT GLUE DRIES FAST!*

Once the glue dried it was time to place the tables in our living room and make them look pretty (which wasn't very hard. I mean come on their gold, obviously they are fabulous!)

YASSSSSS!

I love how they came out! SO much better than before. And now we finally have a place to proudly display my husbands crystal Bourbon set!

I just can't stop looking at them! I am so proud of myself lol and how fabulous is that tapestry? My amazing friend got it for me for a Christmas gift and I just ADORE it and HER!

And there you have it beautiful people, a nesting table set transformed for under $30! It may be a bit more or possibly even less depending on how much you find your nesting table set for! But I can promise you, you will find it cheaper at a Goodwill or thrift store compared to buying it at a name brand store!  I saw a similar set at Luxe DECOR on sale for $372.50 but I love mine much more because I was able to create it myself (and its cheaper hehe)

happy decorating