

Tie dye. When was the last time you did tie dye? Gosh, for me it was during summer camp when I was in elementary school. It was the typical obnoxious primary colors on a t-shirt that rarely got worn.
Now you see "tie dye" popping up more and more when it comes to being incorporated into home decor. The biggest decor trend regarding "tie dye" is found in African indigo mud cloth.
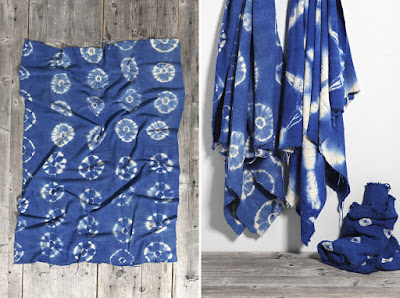
photo creds: Brit + Co
Tie Dye has been found to date back to between 500-810 AD in Peru, Asia, and Africa then being brought over to the Western world. Colors were found in nature from the use of berries and leaves being ground down into pulp and left outside to dry. Once they were dried out, ash and water was added to the died berries and leaves to create a dye. Then the hand woven fabric was twisted and manipulated different ways and dipped into the dye and left out to dry. It is truly amazing how ancient tie dying was done, and still is done today in some places!
Well I do not have the time nor patience to gather berries and leaves to make dye. Nor, do I have the time to hand weave fabric. I don't think any of us have that time. Well some do. But not me haha.
I wanted to make some fabric that I could use to cover pillows, and more specifically an ottoman that I just bought. So I went back to my childhood and had some tie dying fun!
WHAT YOU WILL NEED:
- Tulip Fabric Dye Navy Blue (and black if you want a deeper color)
- Cotton, linen, or some other type of natural fiber fabric
- Large plastic container
- Rubber bands (of different sizes)
- Plastic drop cloth
I wanted to give the fabric I picked out two different types of patterns. For pattern one, I folded the fabric to look like this

To achieve this, all you need to do is take your fabric and fold it like you did construction paper when you were little and made paper fans. So horizontally fold the fabric like an accordion. Once you get to the end, roll the fabric up like a cinnamon bun and put a rubber band around it to secure it. Where ever you put the rubber band is where the dye will stop running up the fabric. It acts as a barrier.
For the second pattern, I folder the fabric to look like this

For this pattern. You are going to do the same accordion folding and then fold it in half and do different ized rubber bands going down the fabric. I did a few overlapping each other to give it a thicker area that will remain white. (Next time I will probably get a bit thicker rubber bands)
Follow the directions on the bottle of dye for proper dying. For mine I boiled 2 gallons of water and added half a bottle of my dye to it. Next time I will probably add the whole bottle OR add half of the Navy blue bottle and half of a black bottle of dye to give it a deeper more drastic color.
I then placed the fabric in the dye for 10 minutes.

With the fabric that was rolled up. You just want to stand it upright in the dye. You will see the dye start to travel up the roll but don't worry, it will stop at the rubber band. My water did not cover my fabric, so I rotated it throughout the 10 minutes.
After the 10 minutes I took the fabric out of the dye and let them sit on the plastic drop cloth for 5 minutes. Then, I took the rubber bands off and hung the fabric up to dry (which only took 2 hours).

Ain't she a beaut?!

See why next time I will use thicker rubber bands? I want the white lines to be a bit thicker. But hey it's ok, as long as I and YOU can learn from it!
Once they were dry, I washed them in cold, JUST cold water. No detergent. NADA but COLD WATER. I washed mine on delicate. The color may fade a bit, which is another reason you might want to add a little black to your dye mixture or add a whole bottle of the navy blue. Have fun with it, experiment with the colors. Then, I dried them on medium heat and ironed them to lock the color in and obviously smooth out any wrinkles.
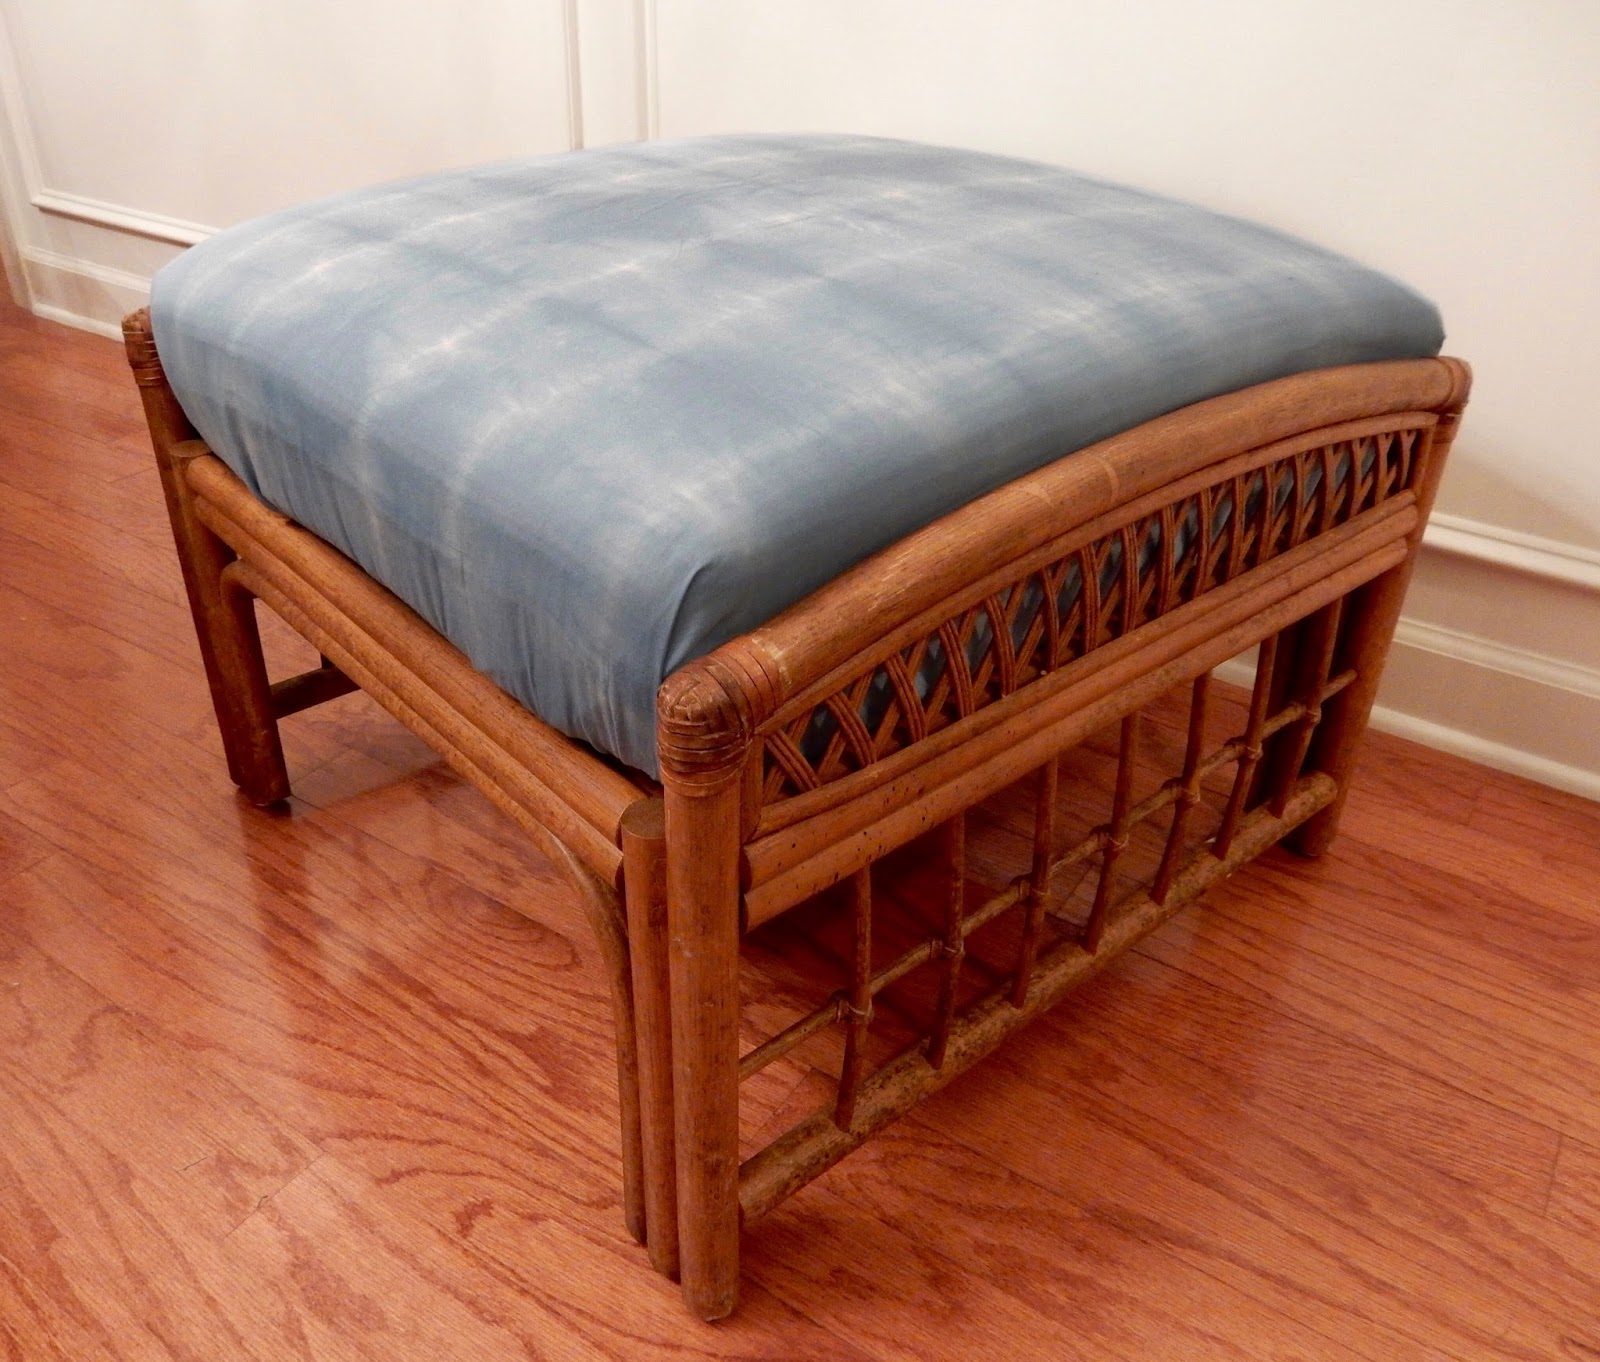
I ended up using pattern TWO to recover a new ottoman I just bought. This was the ottoman BEFORE

I scored it at GOODWILL with a matching coffee table ALL for only $10! When the worker at GOODWILL told me they came together I literally said, "SHUT UP! Well I don't mean shut up, but I am shocked! I'll take it!" All it needed was a little loving'
And here it is AFTER with the new fabric
SO MUCH BETTER!
Tie dye is no longer a little kid activity! It CAN be for adults and it can be used in fun and unique ways for home decor. I'm going to end up using pattern ONE for some throw pillows ;)
*UPDATE*
I ended up experimenting with dye colors and I found the perfect mixture. Like I stated above, I bought Tulip (powder) black dye. I mixed half of the packet of black dye with a bottle of Tulip (liquid) navy blue dye in 2 gallons of water. I let the fabric sit in the water for 15 minutes. I stirred it for 10 minutes and let it sit for 5 minutes. And WOW! It made a BIG difference.

It is actually indigo now and not that soft blue (which I still like and am going to use but I had in mind indigo for our ottoman).
And since it came out the color I intended it to be, I ended up recovering our ottoman

SO, SO much BETTER! And it will find more stains ;)
happy decorating
No comments:
Post a Comment