Showing posts with label boho chic. Show all posts

Sunday, April 17, 2016

TIE DYE FOR ADULTS


Tie dye. When was the last time you did tie dye? Gosh, for me it was during summer camp when I was in elementary school. It was the typical obnoxious primary colors on a t-shirt that rarely got worn. 
Now you see "tie dye" popping up more and more when it comes to being incorporated into home decor. The biggest decor trend regarding "tie dye" is found in African indigo mud cloth. 
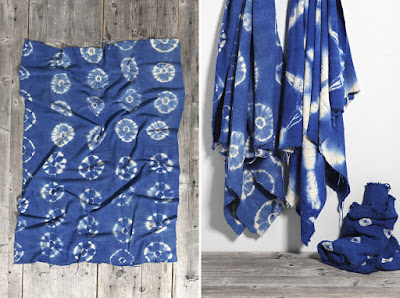
photo creds: Brit + Co

Tie Dye has been found to date back to between 500-810 AD in Peru, Asia, and Africa then being brought over to the Western world. Colors were found in nature from the use of berries and leaves being ground down into pulp and left outside to dry. Once they were dried out, ash and water was added to the died berries and leaves to create a dye. Then the hand woven fabric was twisted and manipulated different ways and dipped into the dye and left out to dry. It is truly amazing how ancient tie dying was done, and still is done today in some places!

Well I do not have the time nor patience to gather berries and leaves to make dye. Nor, do I have the time to hand weave fabric. I don't think any of us have that time. Well some do. But not me haha.

I wanted to make some fabric that I could use to cover pillows, and more specifically an ottoman that I just bought. So I went back to my childhood and had some tie dying fun!

WHAT YOU WILL NEED:
  • Tulip Fabric Dye Navy Blue (and black if you want a deeper color)
  • Cotton, linen, or some other type of natural fiber fabric
  • Large plastic container
  • Rubber bands (of different sizes)
  • Plastic drop cloth


I wanted to give the fabric I picked out two different types of patterns. For pattern one, I folded the fabric to look like this

To achieve this, all you need to do is take your fabric and fold it like you did construction paper when you were little and made paper fans. So horizontally fold the fabric like an accordion. Once you get to the end, roll the fabric up like a cinnamon bun and put a rubber band around it to secure it. Where ever you put the rubber band is where the dye will stop running up the fabric. It acts as a barrier. 

For the second pattern, I folder the fabric to look like this

For this pattern. You are going to do the same accordion folding and then fold it in half and do different ized rubber bands going down the fabric. I did a few overlapping each other to give it a thicker area that will remain white. (Next time I will probably get a bit thicker rubber bands)

Follow the directions on the bottle of dye for proper dying. For mine I boiled 2 gallons of water and added half a bottle of my dye to it. Next time I will probably add the whole bottle OR add half of the Navy blue bottle and half of a black bottle of dye to give it a deeper more drastic color.

I then placed the fabric in the dye for 10 minutes.

With the fabric that was rolled up. You just want to stand it upright in the dye. You will see the dye start to travel up the roll but don't worry, it will stop at the rubber band. My water did not cover my fabric, so I rotated it throughout the 10 minutes. 

After the 10 minutes I took the fabric out of the dye and let them sit on the plastic drop cloth for 5 minutes. Then, I took the rubber bands off and hung the fabric up to dry (which only took 2 hours).


Ain't she a beaut?!

See why next time I will use thicker rubber bands? I want the white lines to be a bit thicker. But hey it's ok, as long as I and YOU can learn from it!

Once they were dry, I washed them in cold, JUST cold water. No detergent. NADA but COLD WATER. I washed mine on delicate. The color may fade a bit, which is another reason you might want to add a little black to your dye mixture or add a whole bottle of the navy blue. Have fun with it, experiment with the colors. Then, I dried them on medium heat and ironed them to lock the color in and obviously smooth out any wrinkles.

I ended up using pattern TWO to recover a new ottoman I just bought. This was the ottoman BEFORE

I scored it at GOODWILL with a matching coffee table ALL for only $10! When the worker at GOODWILL told me they came together I literally said,  "SHUT UP! Well I don't mean shut up, but I am shocked! I'll take it!" All it needed was a little loving'

And here it is AFTER with the new fabric 
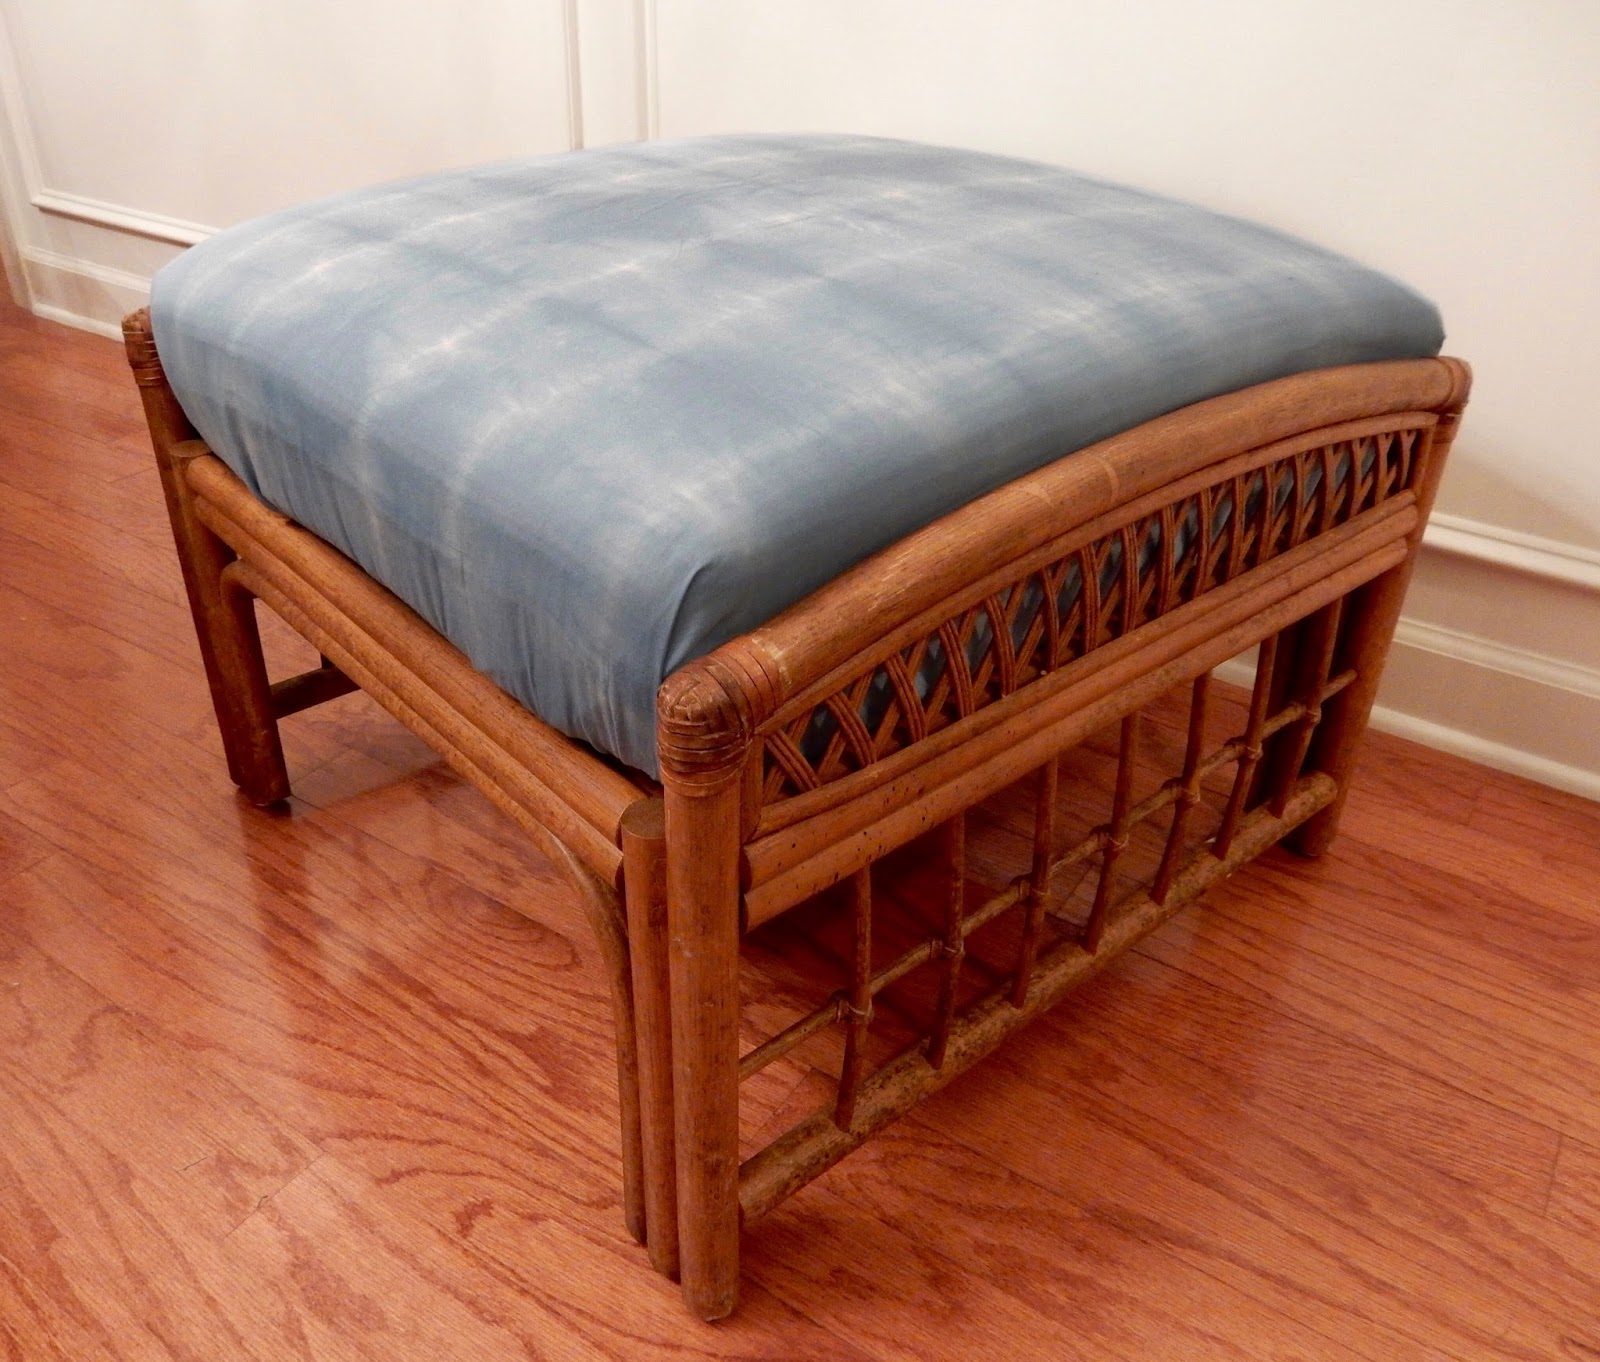
SO MUCH BETTER! 

Tie dye is no longer a little kid activity! It CAN be for adults and it can be used in fun and unique ways for home decor. I'm going to end up using pattern ONE for some throw pillows ;)

*UPDATE*
I ended up experimenting with dye colors and I found the perfect mixture. Like I stated above, I bought Tulip (powder) black dye. I mixed half of the packet of black dye with a bottle of Tulip (liquid) navy blue dye in 2 gallons of water. I let the fabric sit in the water for 15 minutes. I stirred it for 10 minutes and let it sit for 5 minutes. And WOW! It made a BIG difference.

It is actually indigo now and not that soft blue (which I still like and am going to use but I had in mind indigo for our ottoman).

And since it came out the color I intended it to be, I ended up recovering our ottoman

SO, SO much BETTER! And it will find more stains ;)


happy decorating


Tuesday, April 12, 2016

MAKING A BIG SPLASH

Hey y'all! I feel like I have apologized multiple times for being some-what M.I.A for the past few weeks. With the project of our new house coming up there has been a lot of ins and out and paperwork galore. But we finally see the light at the end of the tunnel! We got the news that we will be closing on our house in 7 days! I cannot tell you how overjoyed we were when we found out! I must have done the happy dance a dozen and one times. 
With our closing date right around the corner we have been getting everything laid out. Such as:

Paint colors
Counters
Lighting
Appliances
Flooring
(and my favorite) Backsplash


If any of you read my BLACK AND BOLD KITCHEN post a while back you saw that we were originally going to go for black cabinets with gold hardware and a white subway tile backsplash. WELP that changed! My husband mentioned doing a white kitchen. I immediately looked at him like "WAIT, WHAT?" Not that there is anything wrong with a white kitchen but it was just so opposite from what we had planned originally.

For a while, I wrestled back and forth with the idea of a white kitchen. I told my husband, "I'm ok with doing a white kitchen, but the backsplash needs to be funky!"
I got to ordering tons of samples. I found some Mexican tiles, glass tiles, subway tiles, tile upon tiles! My husband was like, "where the heck did all these backsplashes come from?!" Hehe 

So we narrowed it down to two options. Both of which are from Glass Tile Oasis. 
The Purple Purple Iridescent (left) and the Green Green Iridescent (right).

We loved the Purple Purple and the moment it came in the mail I was sold on having a white kitchen. But then the Green Green came and we liked how it was still funky but a bit muted so we decided on that. BUT then we looked back at our kitchen and the square footage that makes up the backsplash is so small...take a look


There will be backsplash to the left of the fridge, the small portion (not pictured) by the sink


And then the wall where the stove will be. Because there isn't that much wall that will be getting covered we decided it would be best to do the Purple Purple . Everything else is going to be white. White cabinets, white high gloss counters, white paint so we wanted there to be a bright wow statement and I think that this backsplash will be just that.


I love how it changes color is different lighting. Our kitchen gets TONS of great light all throughout the day so I am eager to see what it looks like at different hours of the day.

Along with the white on white kitchen and Purple Purple backsplash; we are of course, keeping our idea of doing gold hardware for the cabinets and gold pendant lighting.

I was nervous at first to do something other than black cabinets but with this backsplash I feel we cannot go wrong! To say that we are thrilled to see our house come together is an understatement! 
I am eager to hopefully share some progress with you all next week when our contractors team gets in there and starts making magic!

happy decorating!


Friday, March 18, 2016

NITTY GRITTY BEFORE PICTURES

Howdy guys! So if anyone has noticed, I have not been blogging too much lately :/ uhhhhh, sorry! Since we are in this moving phase I have not been doing too many projects around the apartment, well because it would be pointless since we are about to move!

UPDATE: We have been signing so much paperwork for our fixer upper of a home! At this point I don't even know what we are signing, we are just signing away hahah! Just kidding, we clearly read everything carefully before we sign! Thank God our realtor, broker, and contractor have been amazing through this whole process! They keep us informed with everything and answer all of my annoying questions that I will think of at like 2 in the morning haha.  For real though, they are such amazing guys, we are beyond grateful for them!
So for those of you who have been asking, we are so close to our closing! Hopefully within the next few weeks we will be closed and construction can begin!
So I wanted to show you guys some before photo's that I was able to get when we were over there last. I know once we sign at closing, things are going to move fast and I wasn't sure if I would be able  to get all the before pics that I wanted to get! So I went picture crazy! I won't share all of them because I took literally a TON but I will share the majority of them!

Our home is one of the only ones in the neighborhood that is set far back off the street! We are removing those two big trees. Sorry tree huggers but it is killing our front yard's grass!

The house is a pale yellow with blue shutters. I do not know who made this color decision. EW. We are brain storming what colors we want to do. We are def doing a black front door and black shutters and then the siding either grey or while. We shall see!

The hubby is excited about yard work! He is going to uproot all those sad looking bushing. I found some blue festuca grass and may night meadow sage that we are thinking of planting along the house! If you don't know what either of those plants look like, take a look:


Aren't they AMAZING?! They are vibrant which I adore but they are also low maintenance and drought tolerant...win, win!

I'm eager to make this little space welcoming! The lantern we are looking to get to replace this outdated one, it a matte black pineapple! I mean, come on! A pineapple to greet you at the door! How could you not love that?!


Ahhh the arched doorway! The beautiful accent to our home that makes my heart flutter every time I see it! The flooring is going to get ripped up and will match the rest of the house which will be laminate. The cabinets we are keeping cause despite their ugly appearance they are in GREAT shape so I am going to give them a little facelift. The counters will be new, new lighting to replace that hideous "hospital" light as I like to call it and new pretty stainless steel appliances!


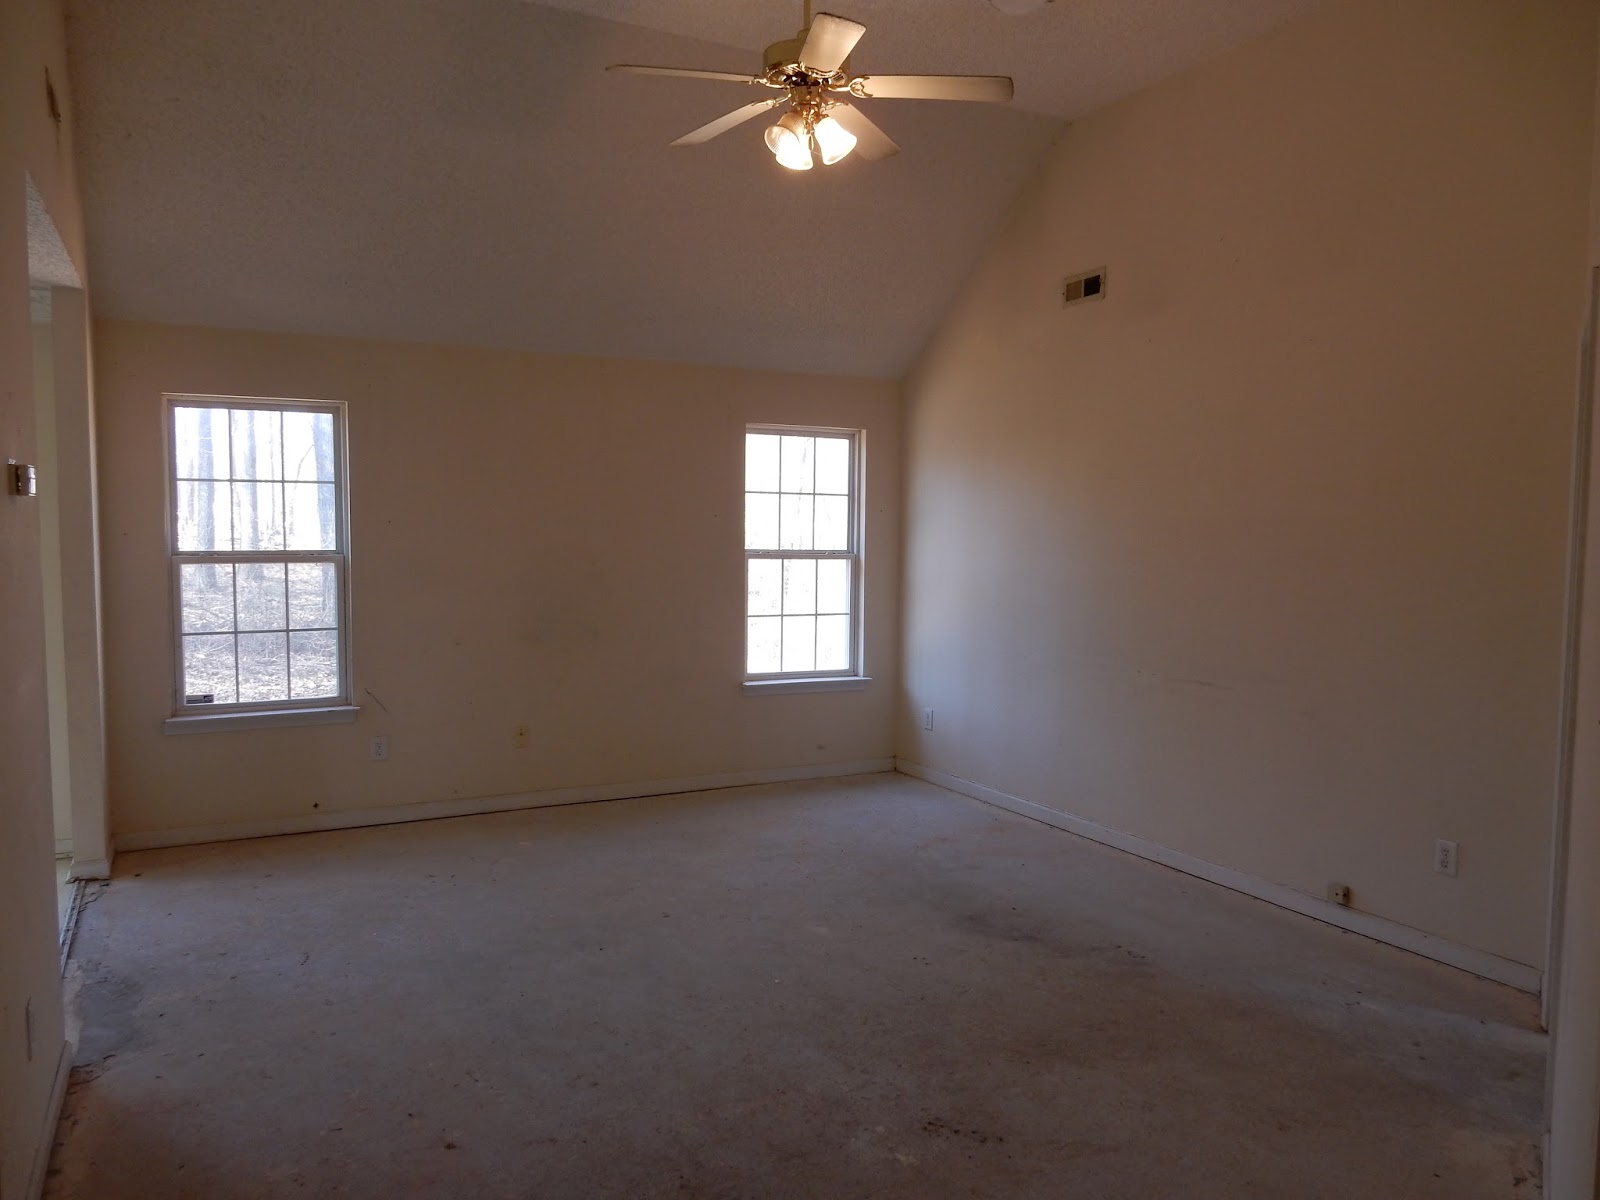
 I just adore our cathedral ceilings in the living room! We love high ceilings so this makes us so happy! The popcorn ceilings are going to be the first things that will be removed, thank God! Again, new floors throughout! A new ceiling fan. Originally we said we were going to do a wood beaded chandelier BUT then realized having a fan in there would be nice if it gets hot when we have company over during the cooler seasons when we won't be using our AC. We are going to do white paint throughout the whole house (Except the bathrooms. We will probably do them a super soft grey) We have a lot of bright pieces so I want them to be the focal point and the walls be a perfect backdrop for our furniture and accents. 

This is our dining area! I am super excited about this because I just found our dining table and it is every bit of gorgeous! It is this old, worn, rustic, some may say beat up; wooden circular table (with inserts if we need it bigger) I am SOOOO excited to put it in this space! We are still trying to decide on what type of lighting we want here. Wooden or metal? Probably metal since the table is so rustic. 

So there you have it! That was the main living area! Later I will share the bedrooms and bathrooms. Our bedroom is obviously the main bedroom that needs to be done, the other two we can take our time in putting together since there won't be an immediate use for them just yet!
We are so so sooooo excited to get started on making this place our own! Once the floors and ceilings are done we are going to move right in and live there while the rest is being done and then obviously do some ourselves over time! But the big things we want to get done now!
We cannot wait to share this process with you! The moment we get our keys and the crew gets in there, I can guarantee lots and lots of photos of the work being done!

happy decorating


Saturday, January 2, 2016

WOVEN WALL HANGING


Hey everyone!! I am sorry to say "I am sorry" yet again for the lack of posting. I have taken a little time off from the blog the past few weeks because I wanted to give my time and energy to my family over the holiday's! It was so nice to be able to remove myself from cyber world for a bit and just enjoy being with my loved ones!
BUT it is a new year and I am back to doing what I love, DECORATING our 900sqft apartment!

I have been seeing a lot of awesome woven wall hangings lately and I must say I am drooling over them all! I love the natural element they bring into a room. They are so simply yet make such a profound statement!
My only issue with them however is that they cost A LOT of money! I have seen them go as low as $65 and as high as $250. Yeah, about that. I do not have $250 to spend on a woven wall hanging. #sorrynotsorry! 
So I studied a photo of one and I made my own and I must say it is so simple, but takes some time cutting all the yarn.

I started off with 4 different colors of yarn from Michaels (they were having a nice sale on yarn so I was able to get all of mine for $15) and a stick (I have no clue the name for it) from Wal-Mart for less  than $2.

the stick is hard to see :/ but it is right under the yarn! 

I then cut the yarn into about 4 ft pieces

I did 5 pieces of yarn for each looped section. (does that make sense?)

Once I had my pieces cut I started to add them to the stick! I wish I took a video doing this, meh! But I will explain it the best I can. 
Take your first color you want to do and have all five pieces of yarn together. Then fold them in half. Lay the stick on top of the yarn and then feed the ends of your yarn through the loop. Ugh, I REALLY wish I made a video for this BUT Michele1218 on YOUTUBE shows you how to do this technique but on fabric garland. It is the same technique to get the results for this woven wall hanging!

you can see here how the wood piece fits snug between the looping. I also braided some of my yarn for additional texture!

I worked on both sides evenly, bringing the design to the middle just to make sure that there was enough space for the amount of yarn on both sides to be even!


Once I finished adding all the pieces of yarn it was time to cut it. This part is super simple but for anyone who needs guidance: All I did was angle my scissors downward and cut from the outside in, to create a sloping effect that meets at a point in the middle.

SUPER EASY RIGHT?!
 I am soo happy with how it came out! It is the perfect piece to fill our naked wall in the hallway!

Give it a shot! And if you do tag me @rebelydecor on instagram so I can see your beautiful work!